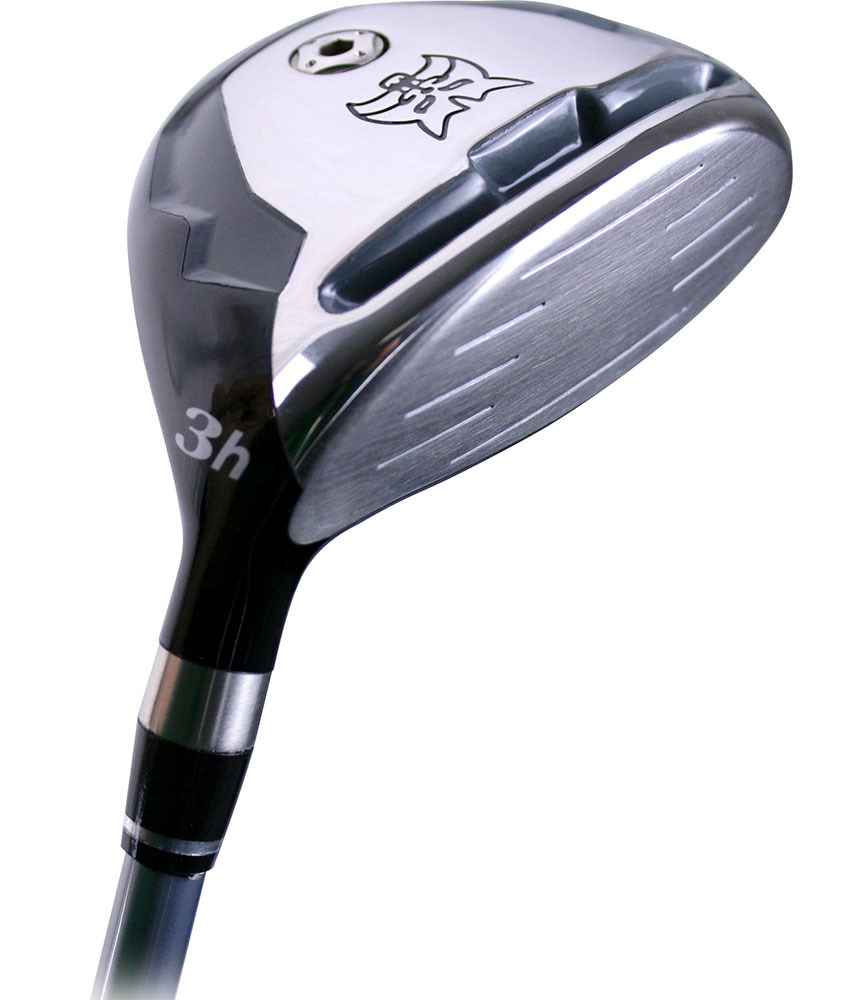
Create Your Own Custom Golf Clubs
- Begin by trimming your golf shaft. Abrade or roughen the first 1¼" of the shaft tip. ...
- Dip the tip of the shaft into the mixed epoxy, making sure that a small glob of epoxy remains on the tip. Insert the shaft into the club head's hosel. ...
- Align the shaft graphics the way you want them by rotating the shaft. ...
- Position the club in the normal playing position. Slide a 48-inch ruler behind the golf club. ...
- Cut a graphite shaft to length using a golf shaft cutter, with a graphite shaft cutting wheel installed in the tool. ...
- Next, install the grip according to Steps 4, 5 and 6 of our How To Regrip Golf Clubs instructions. ...

How to make custom shafts for a golf club?
Nov 19, 2015 · We learn how to correctly assemble a golf club so we can use it for avery long time. Tip and tricks to a proper assembly
How do I make my own golf clubs?
Apr 08, 2022 · Create Your Own Custom Golf Clubs Begin by trimming your golf shaft. Abrade or roughen the first 1¼" of the shaft tip. If a ferrule is to be installed,... Dip the tip of the shaft into the mixed epoxy, making sure that a small glob of epoxy remains on the tip. Insert the... Align the shaft graphics ...
How do you fix a broken shaft on a golf club?
How To Assemble Golf Clubs Set- Instructions Club Assembly If you click on this article and worry that the process may cost you a lot of money, then you can let out a relieved sigh now. In fact, making your unique golf clubs can be much less expensive than buying them from the store.
What tools do you need to build your own golf workshop?
Create Your Own Custom Golf Clubs. Begin by trimming your golf shaft. Abrade or roughen the first 1¼" of the shaft tip. If a ferrule is to be installed, slide the ferrule 1¼" up ... Dip the tip of the shaft into the mixed epoxy, making sure that a small glob of epoxy remains on the tip. Insert the ... More › 174 People Used More Offers Of Store ››
How do you put golf clubs together?
HOW TO ASSEMBLE GOLF CLUBSBegin by trimming your golf shaft. ... Dip the tip of the shaft into the mixed epoxy, making sure that a small glob of epoxy remains on the tip. ... Align the shaft graphics the way you want them by rotating the shaft. ... Position the club in the normal playing position.More items...
Is it cheaper to build your own golf clubs?
The fact is, you can make clubs that fit you perfectly and cost far less than you will pay for clubs off the rack. By following some simple steps and making your own clubs, you'll soon be shooting lower scores than you ever imagined.
How do you install golf club heads?
0:192:36Golf Equipment : How to Install Golf Club Heads on a Shaft - YouTubeYouTubeStart of suggested clipEnd of suggested clipWe need a place to mix the epoxy a stir stick and of course we need a head and a new shaft. To doMoreWe need a place to mix the epoxy a stir stick and of course we need a head and a new shaft. To do that we literally mixed equal parts of the the resin and the hardener.
How long does it take to build golf clubs?
How Long Does it Take to Get the Clubs after the Fitting? The Custom Build Process takes approximately 10 days from placement of the order. Upon delivery of the clubheads, shafts, grips, accessories, etc, the process of Blue-Printing the golf clubs begins. Each piece is accurately measured and weighed.
How far should you hit a 7 iron?
172 - 215 ydsThe average distance golfers hit each club varies widely. A PGA Tour player hits a 7-iron between 172-215 yards....Average Distances for PGA Tour Players.ClubAverage Distance7 Iron172 - 215 yds8 Iron160 - 200 yds9 Iron148 - 185 ydsPitching Wedge136 - 170 yds7 more rows
What size should my golf clubs be?
1. Measure Your Overall Height (i.e. “static” fitting)OVERALL HEIGHTGOLF CLUB LENGTH ADJUSTMENTS5'4″ to 5'7″minus 1/4″5'7″ to 6'1″standard length in inches6'1″ to 6'2″plus 1/4″6'2″ to 6'4″plus 1/2″7 more rows
How do you assemble a golf driver?
3:036:45DIY Club Building: How to assemble a Driver - YouTubeYouTubeStart of suggested clipEnd of suggested clipOr epoxy ends up working its way up. The center of the golf shaft. And once it gets to a certainMoreOr epoxy ends up working its way up. The center of the golf shaft. And once it gets to a certain point. And it hardens you can actually run the risk especially when you're using graphite.
What glue is used for golf club heads?
Golf club heads are attached to the golf shaft with epoxy glue. Epoxy is a thermosetting polymer that is a high strength adhesive. Two parts, the resin and the hardener, are mixed together to create a chemical reaction that cures the epoxy to hardness.Nov 16, 2018
Can you get new shafts on irons?
Reshafting is just one way to keep your clubs performing at a high level. You can also benefit from regripping your clubs. Replacing worn-out golf grips can help make your clubs feel new again. Adding the right shaft to your favorite clubs can get you back on the course and working toward a new personal low round.
How long should an iron fitting take?
Examples: Driver or iron fittings usually take 45-60 minutes, wedge fittings usually take 30 minutes, woods fittings usually take 60 minutes.
How long does a club fitting take?
As a general rule a golf club fitting should take between 45 minutes and 3.5 hours. Full bag fittings take the longest but ittings can also be done in club 'groups' such as 'wood' or 'iron' fittings and these take 1.5 to 2 hours. Individual club fittings take a minimum of 45 minutes and can take 1 to 1.5 hours.
What each golf club is used for?
Generally speaking, a 3-wood is used for a shot in the range of 210 yards, while a 3-iron is used for a shot in the range of 180 yards. A 5-wood is used for a shot of about 180 yards, while a 5-iron is used for a shot of about 160 yards.
Step 1: Organize Your Components
The first instructions to building your golf clubs set is definitely to do your research to see which shafts, clubs head, and grips fit you and your play style the most.
Step 2: Make Your Driver
The most simple step of building your golf club is making the driver, as constructing the driver first will give you an idea of what your final product may look at.
Step 3: Roughen The Shaft
When you’re done dealing with your drivers, it is time to move on working with our golf shaft.
Step 4: Apply Epoxy
The general rule of thumb for choosing epoxy is: The longer it takes for epoxy to dry or cure, the higher the strength or hold on the material in the long run.
Step 1a (Steel Shaft Tip Trimming)
Use a Golf Shaft Cutter to cut the shaft per the recommended tip trimming instructions.
Step 1b (Graphite Shaft Tip Trimming)
Using the Grit Edge Blade mounted in a hacksaw frame, cut the shaft per the recommended tip trimming instructions. Apply a piece of masking tape to the shaft at the cutting point to prevent splintering the fibers of the graphite shaft.
Step 2 (All Shafts)
Measure the hosel depth of the clubhead to be assembled by inserting the shaft tip into the clubhead and placing a mark on the shaft next to the hosel. With graphite shafts, use a pice of masking tape to mark the depth. It is very important that the shaft penetrates completely to the bottom of the hosel.
Step 3a (Steel Shafts)
Sand the tip of the shaft with 100 grit sand paper to remove the shiny finish. This operation is “prepping” the shaft and can be done by The GolfWorks.
Step 3b (Graphite Shafts)
Lightly sand shaft from tape to tip with 150 grit or finer sand paper to remove the polyurethane finish and all the paint. This operation is “prepping” the shaft and can be done by The GolfWorks.
Step 4
The steel shaft tip should have a uniform satin or brushed appearance. The graphite shaft tip should have a uniform grayish graphite appearance. Prepping ensures better adhesion of the epoxy to the shaft.
Step 5
If using a ferrule, slide it over the shaft tip. Note: A small amount of epoxy can be applied to the shaft tip prior to installing the ferrule. This helps the ferrule slide into place easier and keeps the ferrule secure.