How do you assemble a ball puzzle?
0:231:286-Piece Put Together Ball Puzzle - Fast and Easy - YouTubeYouTubeStart of suggested clipEnd of suggested clipSo anyway I'll just show how to solve. This. And then you get this this piece here like so thisMoreSo anyway I'll just show how to solve. This. And then you get this this piece here like so this piece goes here. This piece goes here and this goes here. So it used to come with instructions.
How do you solve a golf ball puzzle?
5:467:39Awesome Golf Puzzle with Solution! - YouTubeYouTubeStart of suggested clipEnd of suggested clipSo there's the two layers. And then that leaves us it doesn't matter what orientation any balls areMoreSo there's the two layers. And then that leaves us it doesn't matter what orientation any balls are here because the lid is all holes. So that will that flush on top.
How do you assemble a wooden ball puzzle?
0:095:01Wood Ball Puzzle - YouTubeYouTubeStart of suggested clipEnd of suggested clipDevice here and what we're what we need to do is find the center piece that is the key to loosenMoreDevice here and what we're what we need to do is find the center piece that is the key to loosen things up and I push on these little squares here. There is the one that's loose right there.
How do you use a puzzle ball?
0:292:20Color Shift Puzzle Ball Review - Puzzle Fidget Toy - YouTubeYouTubeStart of suggested clipEnd of suggested clipYou can push down on the balls to slide them one by one to the ever open moving slot. Inside theMoreYou can push down on the balls to slide them one by one to the ever open moving slot. Inside the ball you'll find a sponge that provides a spring force to keep the balls in place.
How do you solve a spark plug puzzle?
While applying pressure on the front rod pushing it to the left, bang the puzzle hard down on a table; this causes a piece hidden in the right side to drop down, allowing the rod to be pushed further into the right and the left end to come out. The puzzle apart is shown on the right below.
How do you put a golf ball on a block of wood?
4:0610:26Fun Scrap Wood Projects - Magic Golf Ball and Cube Within a CubeYouTubeStart of suggested clipEnd of suggested clipThe trick is to heat up some water to almost boiling and submerge the wood in the water for aboutMoreThe trick is to heat up some water to almost boiling and submerge the wood in the water for about seven or eight minutes. This makes the wood more pliable.
How do you assemble a 12 piece wooden cube puzzle?
1:213:24How to solve a 12 piece wooden Cube Puzzle - YouTubeYouTubeStart of suggested clipEnd of suggested clipTake one of the big half cube hair pieces. Then take the thin CDs. And place it into the blue withMoreTake one of the big half cube hair pieces. Then take the thin CDs. And place it into the blue with the end of the Z pointing upwards.
How do you assemble a burr puzzle?
4:349:09Six Piece Burr Puzzles - YouTubeYouTubeStart of suggested clipEnd of suggested clipSo let's write down those two different possibilities. Let's say we had ei. We already have e and aMoreSo let's write down those two different possibilities. Let's say we had ei. We already have e and a put together here. But what about the piece that has to go here vertically.
How do you solve a wooden square puzzle?
0:001:01How to solve the snake cube puzzle - YouTubeYouTubeStart of suggested clipEnd of suggested clipThe first thing is to unwind it says all one straight line this one is a bit more precise typically.MoreThe first thing is to unwind it says all one straight line this one is a bit more precise typically. It might look a little bit like this because there's a lot of slack in sight.
What is the ball puzzle called?
A puzzle globe (also called jigsaw globe, globe puzzle, puzzle ball, puzzle sphere or spherical puzzle) is a spherical assembly of puzzle pieces that, when put together, form a complete sphere or globe.
How many balls are in a puzzle ball?
There are 12 with only 11 filled with a colored ball. Utilize the empty hole to shift balls around to find their matching hole. Once all balls match their colored outer rings, the puzzle is solved!
How do you solve a circle number puzzle?
0:401:57Number Puzzle #2 | Find the missing number circle puzzle - YouTubeYouTubeStart of suggested clipEnd of suggested clipNow see here 4 and here in the second box we have 3. So 4 plus 3 we have got the answer 7 now 5 plusMoreNow see here 4 and here in the second box we have 3. So 4 plus 3 we have got the answer 7 now 5 plus 9 is 14. And 1 plus 8 is 9. Now observe the pattern which you are getting in circle number four.
Step 2: Drawings
You will be building to this drawing. As you can see, there are only two different parts to the puzzle. You will need 10 of the cyan colored part and 2 of the magenta.
Step 3: Starting Board
I cut a 1x6 down to 4.5" wide. Not that the actual thickness for a 1x6 is 3/4". Depending on how you route later, you might want to sand this board down by ~ 0.02". I didn't need to do that since my 3/4" router bit produced a 0.765" wide cut. The important part is that the material fit nicely into the notches that you cut.
Step 4: Main Slots
Two of the three slots for the parts are cut on the 4.5" x .75" board. These slots were done on the router table. That's Kevin in the picture.
Step 5: Cut Pieces
The individual parts can now be cut from the board. I used a table saw without a sled. Kevin shows a nicer way of making these cuts - see the video in the intro for more info.
Step 6: 3rd Notch
If you didn't see it in the drawing, this notch is the difference between the two parts. To me, this was the hardest step since the parts are small and I don't like to get my hands close to rotating machinery. I cut two pieces of scrap and ran them through the router. I then positioned the part between them and ran the set across the router.
Step 7: Sand and Finish
I didn't spend much time here - just cleaned up the edges. Once sanded, I finished the parts with Danish Oil. Kevin didn't add any finish to his.
Step 10: Solution Pictures
The puzzle is pretty daunting with 12 almost identical pieces in your hand. However, it's really not that complicated.
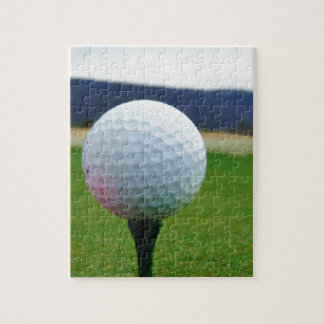
Step 2: Cut the Tee
Depending on the size of your jar, cut the tee so it will hold the ball at a desirable height within the jar (when the tee is placed on the inside of the lid, under the inverted jar).
Step 3: Epoxy Putty Mound
I scratched up the inside of the lid with a hobby knife so the epoxy putty would bond a little better.
Step 4: Place Tee
The golf tee was pressed into the center of the still-soft mound of epoxy putty.
Step 5: Paint Some "grass"
I used some green enamel hobby paint to add a coating to the epoxy and the inside face of the lid.
Step 6: Epoxy for Lid
For this little puzzle I wanted the lid to be permanently affixed to the jar.
Step 8: Done!
Despite my best efforts, there were hundreds of tiny micro-bubbles clinging to the ball and tee, and these eventually joined together into the large bubble shown in the top photo. Oh well!